By Wayne Adair
At age 63 now, I’ve been a knife owner for 59 years.
Your math is correct. I was four years old when I received my first pocket knife, a gift from my beloved grandmother. She was a member of the hard-working agrarian class of rural Tennessee who viewed a knife as an important and ever-present tool.
When I proudly showed my grandfather the gift, a single-bladed Texas toothpick style with a candy stripe pattern, he looked at it approvingly, tested its edge with a callused thumb and said, “Wayne, that’s a fine knife, but it’s not a toy. You have to use it carefully and respect what it can do. Don’t cut yourself.”
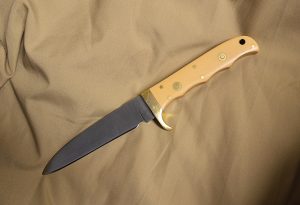
I did – respect it – and I didn’t cut myself.
No sooner had I received the knife than I began to make a bow, arrows, and small sticks out of large sticks. The first two reflected my love of American Indian culture. The third? Anyone who’s lived in the South knows that when relaxing under a favorite shade tree, you take out your knife and whittle.
And thus, my second lesson of knife ownership came quickly: even a finely-crafted blade dulls, sometimes quickly, and a blunt blade must not be tolerated.
Now comes the point in this narrative that still has me shaking my head. Why didn’t I just ask my grandfather for a lesson in sharpening? Truth be told, I was a stubborn, independent child who liked to figure things out for himself. Probably would have saved me decades of trial and error later in life.
Instead of asking for help, I grabbed a coarse sharpening stone I had seen my grandfather use many times and got to work, mimicking his technique as best as I could remember.
The old, worn stone, its once-flat face now deeply concave from decades of use, was rectangular with an orange wooden handle. I pressed the flat of my new blade against the surface at a slight angle and pushed it away from me, then repeated the process on the other side of the edge.
Beginner’s luck, no doubt, but the knife’s edge was quite sharp, and for years that’s how I sharpened knives.
About the time I turned 10, I was reading the top outdoor magazines of the day, primarily Field and Stream, Sports Afield, and Outdoor Life. Occasionally, they would feature articles on knife-sharpening techniques that always seemed to offer the same advice: “Hold the sharpening stone in your left hand while stroking the blade across the face of the stone. Make sure the angle is constant at 22 degrees. Carefully count the strokes, making sure each side gets an equal number and be careful to avoid a wire edge … ”
I followed the instructions and began to produce sharper edges, but never the razor-sharp cutting surface that I longed to master.
Instinctively, I knew that symmetry and balance were vital to create a fine cutting edge, hence those articles’ admonitions to give each side of the blade an equal number of strokes against the abrasive. But no matter how carefully I counted, the blade was never as sharp as I wanted.
Then, one day when I was older, I had one of those “well, I’ll be” moments of clarity. No matter how carefully I counted, I could never achieve balance because, being extremely right handed, I would bear down harder on one side than I would on the other. When I realized this, I took a close look at the edge I was working on. Sure enough, they were significantly out of balance, one cut much more deeply than the other.
About this time, I realized another huge flaw in the knife-sharpening instructions I had been reading. It’s pure folly to hold the sharpening stone in one hand, the knife in the other, and expect anything but an inferior edge, and often, filleted fingers.
Over the years, I experimented with the best way to secure the stone to a solid surface. In my young adult years, I found I could use simple C-clamps to affix the abrasive to a counter top. Then I bought a folding worktable — a Workmate, if memory serves — and that worked well.
When I finally bought a home in Idaho, I built a sturdy workbench in the garage and had a permanent sharpening station.
A sharpening stone primer
For many of the years I passionately pursued my quest for a shaving-sharp edge, I used stones that were natural, usually the excellent Arkansas stones. They came in extremely coarse to nearly as smooth as the surface of fine china. I also experimented with man-made Carborundum stones. They all work well, but require an oil-based lubricant to keep the abraded steel from clogging up the honing surface, which is messy beyond measure.
Then I discovered diamond sharpening devices, and now use nothing else for the coarse segment of the sharpening operation.
My go-to hone measures 11×3 inches and will accommodate the largest kitchen knife. Most big game guides who field-dress animals for a living use knives with blades no longer than five inches or so. With such a cutting tool, a six-inch hone will work, but extra length is an advantage.
Diamond stones come in coarse, medium, and fine grits. I always opt for the coarse version for its aggressive abrasion characteristics. Natural stones feature similar designations, although they often lack the uniformity of the diamond-coated versions.
Whatever stone you use, the surface needs to be moistened. This keeps the steel particles worked off of the blade from becoming imbedded in the abrasive, seriously decreasing its effectiveness. With my diamond hone, I use common household cleaners. The blue window-washing fluid works fine, although I prefer a cleaning liquid that is citrus-based, mainly because I like how it smells. Plain water will work. And in a pinch, if nothing else is available, saliva is effective, although there’s a significant “yuck” factor there.
If you opt for a natural stone, use an oil-based medium. Several companies sell honing oil, but you can make your own very cheaply. A 50-50 mix of kerosene and common motor oil works well.
Diamond sharpening stones are pricey. My 11-inch model cost almost $100, but I use it often and it was worth every penny. And it should last a lifetime. Effective natural stones cost a fraction of that but do wear away with use.
Time to sharpen a knife
Make sure your sharpening stone is securely fixed to a workbench or other solid work surface. I made a holder for my diamond stone by carefully tracing its outline on a scrap piece of 2×4 lumber and chiseling away the waste wood until the steel plate fit tightly in place. Then I simply screwed the board to my workbench. It’s easily removable just by backing out the screws. In lieu of such a semi-permanent arrangement, C-clamps work fine, but be sure to use the smallest possible. The top surface of the stone must be higher than the clamps so movement of the blade across the surface won’t be restricted.
Before you start, take a good look at the cutting edge. I’m assuming your knife is new or has never been sharpened enough to alter the factory grind. If the cutting edge has been badly missharpened in the past, beginners should have a professional put an effective edge on the knife. Then when it dulls, there will be a good point of reference for the next resharpening.
One side note here: With all due respect to the fine folks in the marketing department at Ginsu, all knives will get dull, and the ability to resharpen a blade is just part of the joy of knife ownership.
I think it’s important to position your sharpening stone where you can stand up to do the work. For me at least, this permits more angle control and power of sharpening stroke. My workbench is perfect for this.
Let’s define terms here. I’ll often refer to the bevels that create the cutting edge. In all quality knives, the entire blade bevels, or decreases in thickness from the heaviest part of the blade, the back or spine, to the thinnest part, the cutting edge. The character of the cutting edge is defined by the secondary bevels, the small area that will be the sole focus of your sharpening efforts, usually ranging from ⅛-inch to 3/16-inch wide. This will vary with the thickness of the blade. For the sake of clarity, when I mention bevels, it’s these secondary bevels that I am referring to. The vast majority of your blade, the primary bevels, will never contact the sharpening stone.
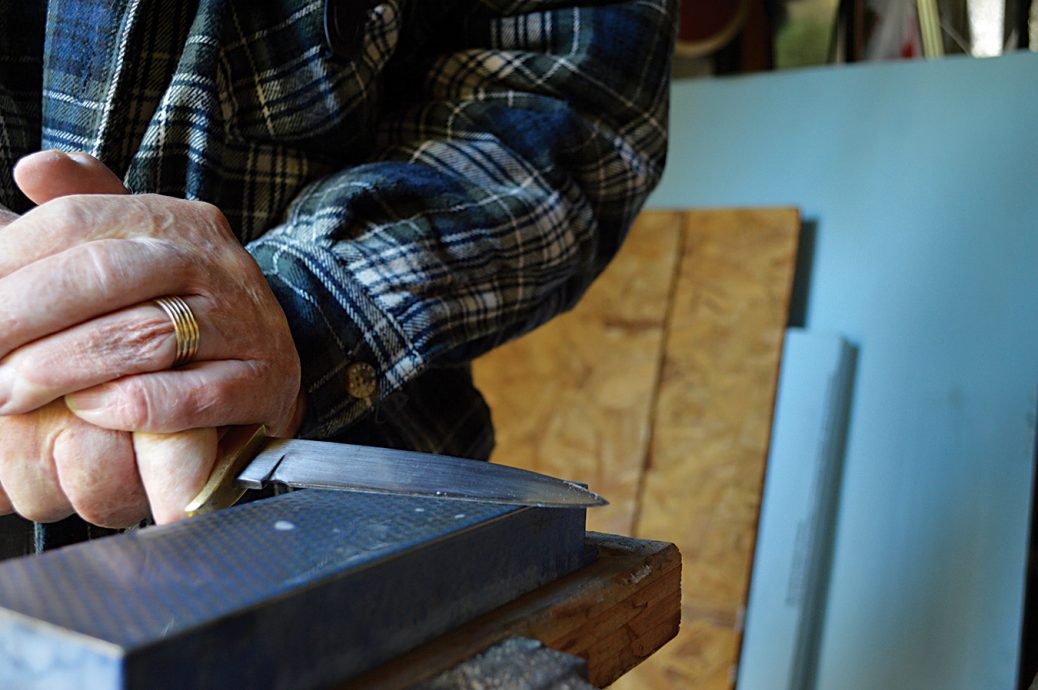
Place a generous amount of lubricant on the stone and take a firm grip on the knife’s handle. For the right-to-left stroke, I hold the knife just as if I am going to make a slicing cut then I grip my right hand with my left, slightly overlapping the knife’s guard or bolster. This greatly enhances the power of the stroke. Effective sharpening is a two-handed job.
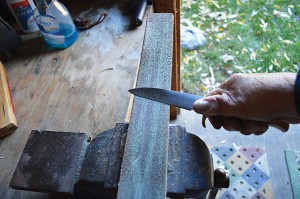
What you do next is key to how successfully you can complete the task at hand. Place the blade flat on the stone gently, and then angle the back of the blade up until the full length of the bevel that forms the cutting edge fully contacts the abrasive surface. With subtle pressure, move the blade slowly across the stone from base of the blade to the point, as if you are trying to slice a thin layer off the stone. With curved blades like the one in the photo, you’ll have to pivot the blade up slightly to keep the edge in contact with the stone.
The intent of this initial movement is to ensure the cutting bevel is fully contacting the abrasive. After a stroke or two, carefully examine the cutting edge. A magnifying glass and good lighting can be a big help here. The goal is to be sure the striations created by the abrasives extend from the back of the bevel all the way to the cutting edge.
This can be difficult to see. An old trick I learned years ago is to use a black marking pen to darken just the cutting edge. Then it’s easy to make sure the edge is being abraded over the entire plane of the bevel. If just the leading portion of the cutting edge is shiny, you are holding the blade at too steep an angle. If the back of the bevel shows that shine, you’re holding the blade too flat in relation the stone’s surface.
Adjust your effort accordingly. You’ll soon get the technique mastered. Now it’s time to exert some force as you move the blade across the surface of the hone. It’s hard to say how much, but I’d estimate 10 to 15 pounds of downward exertion. Most hunting knives have a blade sturdy enough for this. If your knife has a particularly thin blade, take that into consideration.
After eight or ten strokes, look at the bevel again. You are looking for that dreaded “wire edge” the magazine articles warned about, except, with this technique, that’s exactly what you want. Be aware it can take many more than 10 strokes, depending on how hard the steel is, the coarseness of your hone, and the amount of pressure you use. But the wire edge will eventually be there.
A wire edge simply indicates when the steel on the side of the bevel you are working on is thin enough to fail, to literally fold over. This means a new cutting edge has been formed. You can feel this folded steel with your fingers, and if the light is good, you can even see it. For a truly sharp blade, the wire edge, sometimes called a burr, must extend the full length. But be patient. If your burr doesn’t form quickly, don’t worry; it will come.
When it forms, it’s time to work on the other side. Simply reverse your grip and repeat the process stroking the blade the other way. Don’t be fooled, however. On this side of the blade, the burr will seem to form very quickly. That’s just your original wire edge folding over from the other side. That’s normal. It’s important to look carefully at your bevel in progress to ensure you are sharpening that side with the same amount of force as its opposite twin. Soon you’ll feel the true burr form.
You’re more than halfway to a sharp blade.
Now it’s time to change stones and count. I use an extremely fine ceramic finishing stone that looks and feels like marble. It too needs to be lubricated. Go back to the first side you sharpened and, keeping the same angle, stroke the blade eight or ten times across the stone. Not as much pressure is needed now. With these few passes, the wire edge should fold back over to the other side. If it doesn’t, continue honing until it does.
Turn the knife back over and repeat the number of strokes you made on side one. The burr should fold back the other way. With each pass, slowly decrease the downward pressure. Now repeat this process, decreasing the number of strokes equally on each side until you are honing once and turning, honing once and turning. By now your pressure should be very light.
Obviously what you are doing here is making sure the final cutting edge is centered. During this back-and-forth final step, the burr will disappear. Often you will see a fine whisker of steel on the surface of your hone when it breaks free from the blade. At this point your blade should be very sharp.
Finishing the job
Occasionally a burr can stubbornly refuse to completely go away. There’s one last step that can solve this problem.
Take a heavy leather belt — real leather, no man-made substitutes — and make a loop by running the leading edge through the buckle. Slip that over a sturdy doorknob and pull very tight. The inside of the belt must be facing up. Stroke your knife along the surface at the same angle you used during the honing process, but move the blade edge away from you. You’ve probably seen barbers do this with their old-fashioned straight razors. Ten or 12 strokes alternating on each side of the blade should be plenty. Done carefully, this will remove any residual burr and leave your knife’s edge frighteningly sharp. Even if you have no wire edge remaining at all after the fine-honing state, this stropping technique will polish and perfect your cutting edge.
How sharp can this get the knife? My poor wife has finally gotten used to walking into the bathroom and watching me shave with a full-size hunting knife. Sometimes to test how effective this is, I’ll follow up with a brand-new disposable razor, and am happy to feel there’s no facial hair left for the factory-perfect razor to cut. But, seriously, don’t try this at home.
If your first sharpening effort is less than successful, don’t give up. There’s definitely a learning curve, and some of the steps are tricky. But with a little practice, you can master the ability to create effective cutting edges quickly and with little effort.

Great article! Thank you for sharing your story as well. You have a lot of experience when it comes to knives and I’m just curious, out of all the ways the sharpen knives, which one do use most often? What’s the easiest way for you?
I love this. You just made learning about sharpening knives very interesting! Just a quick question, how often do you sharpen your knives?
Great information! Great article!
That was a very informative and helpful article. Thank you!