By Lacey Jean
“I would sleep on this. And wear it! I would bring it everywhere!” one cherub-cheeked youngster exclaimed as he pressed his face into the sheepskins hanging in my farmers market booth. Others stroked the tightly woven curls of wool and plunged hands deep into its fibers. Kids just get it. They don’t need to be told how to use sheepskins. At one time, I had my own sheepskin awakening at a market when I asked the vendor what I could use it for. Her eyes lit up as she said, “Well…”
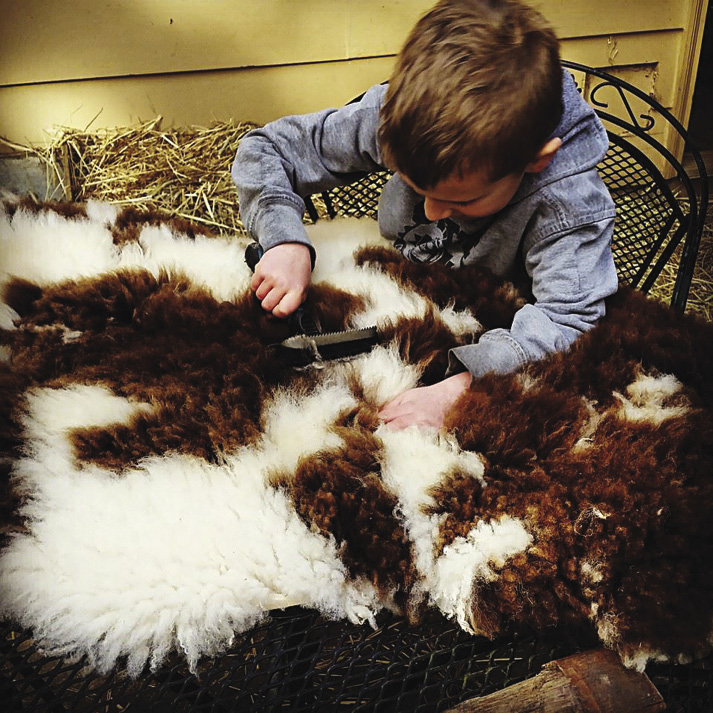
I bought the Navajo-Churro pelt and promptly fell in love with everything about it. But I didn’t love the fact that it smelled of chemicals so strongly I had to air it out on the line for several days before bringing it into the house. Surely there must be a way to tan hides without the use of chemicals? I reasoned that the native peoples have been practicing this craft for centuries, long before the uprise of factory production.
My dilemma took me on a search, which led to a determination to try my hand at this. How hard could it be? I have since found that while it isn’t so much a hard skill to understand, it is one that must be carefully practiced to get a feel for the nuances and to build the right muscles for the task.
Procuring a hide
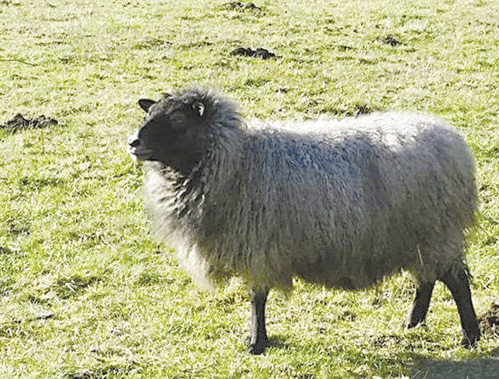
Local farmers who sell lamb have always been my best source of skins. I started by asking for the throw-away pelts which had been botched up during butchering, had undesirable wool, or were simply unwanted. It is always a good idea to have something for trade. Some eggs, work trade, or home-canned goods will ensure that you keep a good connection with the sheep farmer, with the hope that there may be more sheepskins in the future. As my tanning skills have improved, I have begun giving back a tanned hide for every several that I get to keep, depending on the quality of the pelts. I have even bought a few sheepskins when the fiber and length has been right.
So now you have your practice pelt. Until you can begin working on it, either roll it up into a plastic bag and stick it in the freezer, or liberally salt it with some kiln dried salt found from the feed store. You want to cover the entire inside of the skin with salt in a heavy layer. It helps if you can put the sheepskin wool side down on a slightly slanted pallet or other surface that allows air flow. This will encourage the sheepskin to dry and moisture can easily drip off. The sheepskin will keep this way in a covered building for a very long time. If you plan to leave it there for more than a week or so, I would suggest pulling any large bits of fat and tissue off, as this is likely to rot the hide.
Fleshing
I will start by warning you that this part of the process can take a very long time to perfect. Much like becoming an artisan baker, the only way to get good at it is to spend time struggling through it and finding your groove.
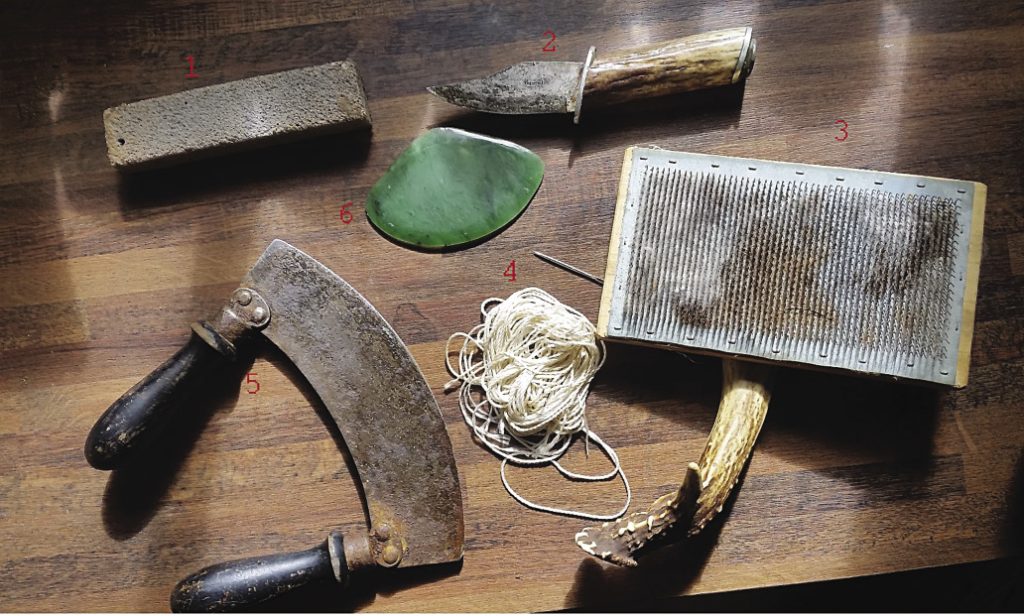
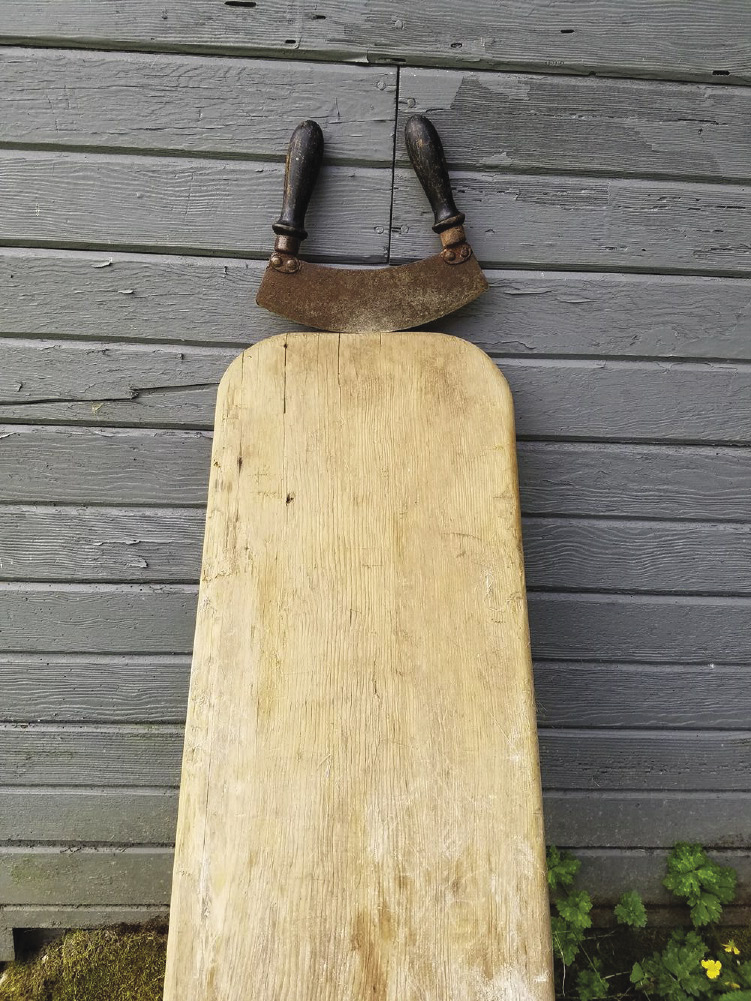
I have found my favorite tool for fleshing to be some antique kitchen rocker knives with no sharp points. They vary slightly from many ulu knives that often do have points on their ends. The knife you choose should be rather dull and easy to grip with two hands so you can keep good control.
A fleshing board is also helpful for this step. I use a thick, slightly concave board of 4½ foot length (as I am not tall in stature), with one end sanded down like the top of an old surfboard, so as not to damage the hides. I straddle the bottom of the board which is placed at an angle to the wall, lightly pinching the base of it between my boots. The top of the board rests against something solid like a fence or building. I prefer a fence, so that the board can rest directly on top of it. Lay your sheephide, skin side up, over the top of the board, and draw a portion of the hide between the fleshing board and the fence or building to pinch it in place while you work. Some folks use a clamp, but you will need to move the hide often, and repositioning a clamp can become rather tedious.
It is easiest to start fleshing where there is a natural edge, either from the way it was butchered, or towards the center of the back where there is typically less tissue. I have found it easier to get your dull blade under the tissue at these places to begin the work of removing it from the skin.
Here is where I will have to admit that no amount of written direction can replace time spent just getting a feel for fleshing the hide. I watched videos and read countless books, and it came down to just finding my own rhythm. With my fleshing knife, I make a controlled chop at an angle, slanted towards my knees — not straight down into the flesh, and most definitely not side to side! There is no sawing or slicing. Controlled, dull chops downward with the slant of the fleshing board to get the tissue and fleshy bits to loosen up. When you can get a good bit loose, use your hands. Work your fingers between tissue and flesh, and slowly pull the flesh slightly up with one hand while pushing down on the hide with the other. This ensures that you will get an even layer, without the risk of cutting the pelt. It is my hope that one day my hands will be the only tool I need for this part of the process.
My first sheepskin took about three hours to flesh and appeared to have been chewed on by ravaged wolves when I finished. Today, I can flesh out a hide in 15 minutes and it will be clean and free of additional tears or cuts. Don’t fret if you don’t think you’ve gotten all of the membrane removed. Removing the muscle and fat is most important.
Cleaning
My favorite step. This is when the transformation begins, when the sheepskin goes from being a ragged, drab, smelly dead animal skin to something luxurious. In the summer months, I have found it best to hand wash the hides in a large tote or an old bath tub if you have one outside to use. Rainwater seems best, but well or city water won’t ruin it. Fill the tub with cold water and add a soap of your choosing. Some use a dish soap, but I prefer to use a biodegradable soap because I dump the used water onto the pasture where my animals live and eat. Depending on the density and length of the fiber, this can be rather time consuming, and you may wish to take shifts. It is fine to soak in the tub for a good portion of the day. Swish it around and try to loosen bits of dirt and debris. Be careful not to agitate the wool too vigorously lest you felt the wool. Exchange the soiled water for clean as many times as it takes until the water stays clear. During the colder months, I will wash the sheepskin in my clothes washing machine on delicate with cold water. I have a very understanding spouse. In this instance, I will run it through the spin cycle twice to remove as much moisture as possible. Hanging the hide up on a clothes line or fence for a few hours to let it drip out is a good idea if you’re not able to ring it thoroughly with your hands.
Braining
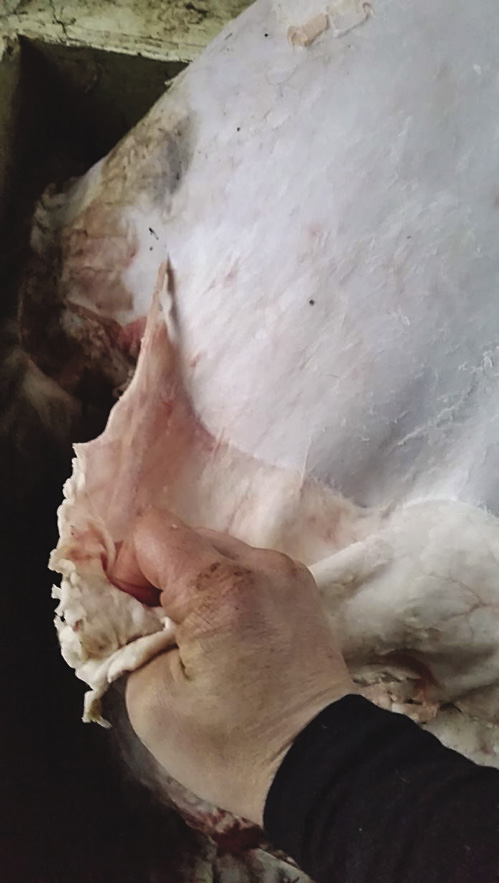
Once your hide is cleaned it is time to get the tanning solution onto the skin side. I prefer to use brains from a pig. I order a large box of pork brains from my local butcher. One pig brain will cover three to four sheepskins. If you are only doing one sheepskin, you may try to remove the brain from the sheep you are tanning, or ask the farmer who had them butchered. Each animal has enough brain to completely tan their own pelt. Nature is industrious like that.
Plop the whole brain into a container twice the volume of the brain at least. Add hot water until it is submerged, and using an immersion blender or other blending implement, give it a few good pulses until it’s the consistency of a thick strawberry smoothie. I’ll admit, I think twice before sipping on a pink colored smoothie these days. The mixture should be warm. Using your hands, smear the mixture over the skin, massaging it in to help the solution set into the cell structure. I typically do this step at night, roll the skin up so that all the brain-soaked parts are touching each other only, and let it sit overnight before beginning the next step. Do your best to keep the brain matter from touching the wool.
Stretching
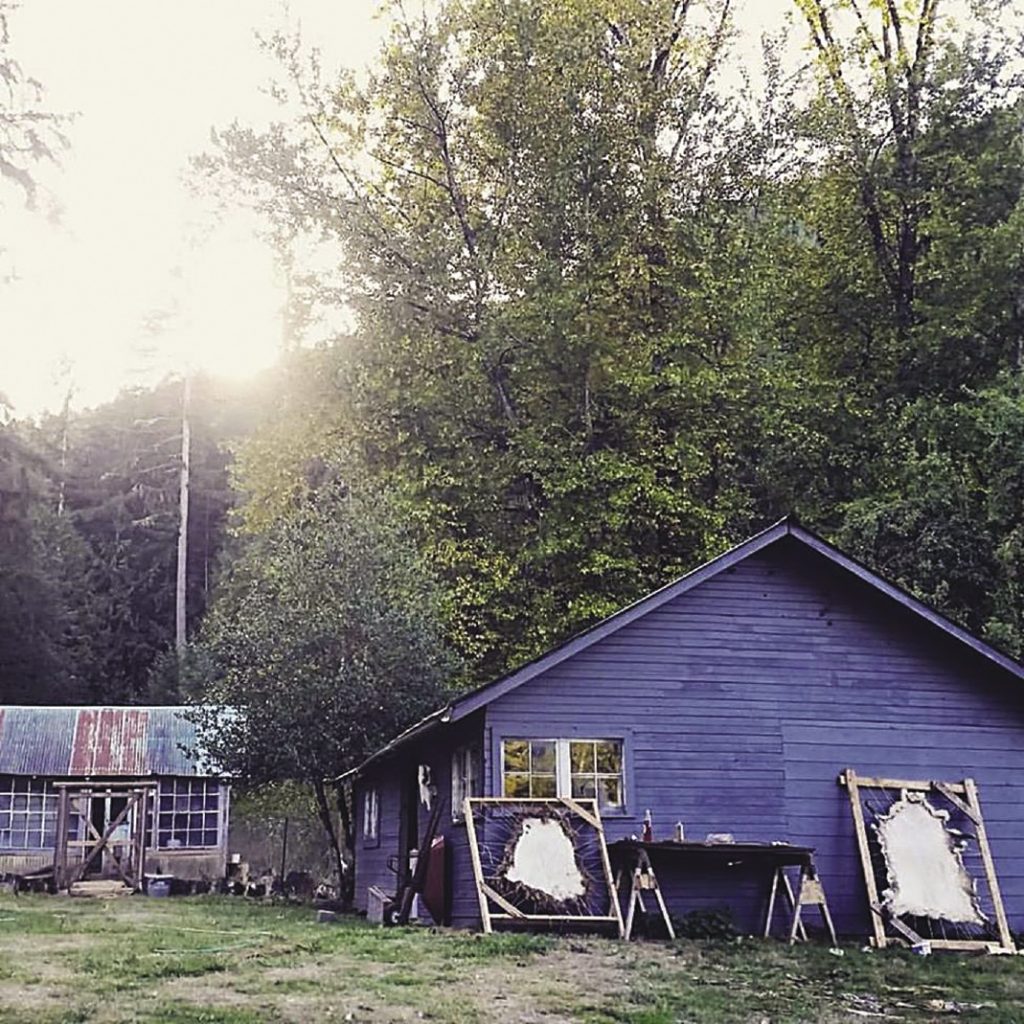
I prefer to stretch the hides on a rack. This makes the step slightly less physically demanding than if I were to do it by hand. Since I tan three or four sheepskins a week, that would become rather tedious work. By stretching the skin on a rack, I’m also able to scrape off excess membrane, dirt, or tissue that may still be stuck to the skin. A rack can be constructed of many things, but I have simply used some 2x4s to make a square. I have 4×4, 5×6, and 6×8 foot racks to accommodate the various sizes of hides I work with. Bracing the corners will keep your rack from shifting under the pressure of the pulling cordage while your hide stretches. Drive nails every six inches or so along each side of the rack, leaving approximately an inch of nail sticking out, around which you’ll wrap the cording. I use nylon cording because it is hardy enough for repeated reuse.
Lay the rack over a tarp or cloth on the ground, then lay the cleaned and brained sheepskin, skin side up, in the very center. I begin threading my cording in one corner of the hide, typically where a leg would be. Using a leather needle threaded with the cording, punch through the underside (wool side) and draw the cord through the skin. You may need pliers to pull the needle through, depending on how thick the skin is and how slippery your fingers are. Pull through enough cording to do an entire side of the hide. You’ll eventually get a feel for the length required. Make a slip knot in the end of the cording and attach it to a nail on the rack. Pull the cording taut and continue piercing the hide and looping the cord over nails in this pattern until you run out of cording, working your way down the edge of the hide. I usually push the needle through ½ to 1 inch from the edge of the skin so that it does not easily tear. Do not worry about pulling the string tight until you have gotten the whole hide threaded.
Thread the opposite corner of the hide next, then the two remaining sides. Take care to pull the hide evenly, with firm, but slow motions to keep it from tearing. It is best to use your hands to pull on the hide while you tighten the string, as opposed to pulling only on the string. All the pieces of hide that are not tight will rot, so be sure all edges are being pulled. I test my strings by plucking them. They should sound tight like a guitar string. The hide itself should have some spring to it, but not be so tight that it will tear if you push on it. Experience will be your best teacher.
Once the hide is on the rack, you will have to make a judgement call. Is it humid? How damp is the hide? I rarely leave the hide to stretch at this point without doing an initial scrape of the skin to remove excess moisture. If your hide does not dry quick enough in this stage, it will begin to rot and the hair will “slip” or fall out. Your heart will sink if this happens after all the work you’ve already put into it. But if it should happen, at least save the wool! It can be spun into yarn and the skin can still be worked into leather. The racked hide should be somewhere dry at this point. If rain is in the forecast, bring it indoors.
Scraping
This portion may take 12 hours. It may take a week. It depends on many variables. Weather, humidity, where you are working the hide, how damp the hide is, how thick the skin is, how big it is, and how much time you have to dedicate to it all will affect the amount of time required. Thankfully at this stage, if you really needed to, the hide could stay on the rack for quite some time and you could come back to it, re-soften it and continue to work. I like to try to finish a sheepskin in four days if possible. Using the tool you fleshed with, you will begin to gently scrape and press against the hide to push the cell fibers apart so they do not lock up and stiffen, but stay soft and pliable even after they’ve dried. Starting from the edges, work into the center in slow, deliberate motions, pressing and scraping your tool down the hide. You will scrape off vile looking liquid and tissue. Keep a bucket and towel handy. Occasionally flip the rack so the hide is being worked from a different angle. If the hide seems brittle, or like it is not softening, you can add another layer of brain mixture. This will help soften the skin. As you scrape, look for the skin to turn white, or the color of rawhide. That is when you know you are close to being done. I hesitate to suggest this next tool, due to how many hides I’ve ripped with it, but for particularly stubborn and thick sheepskins, using a sanded down hammer handle can be used to apply dull direct pressure to help push out the cell fibers and soften. Work slowly and avoid weak spots, lest you tear through. You will use the end of the handle, being sure all sharp edges have been sanded down smoothly. I happened to have an extra handle laying around from a broken hammer. Any other blunt stick of this size and shape would also work.
Should your hide dry too fast and stiffen, don’t despair! Simply dampen the skin with a warm damp sponge until the hide becomes pliable again. When the entire skin side of the hide is the color of rawhide, pliable, and dry, flip it around to comb out the hair. Most sheepskins I get are full of seed-heads, straw, thorns, and other debris. Some must be plucked out by hand, and then brushed and brushed and brushed some more. A metal-toothed dog grooming brush and a carding comb are my weapons of choice. I have found a spray on, dry-shampoo for horses works well for this stage, but it isn’t necessary. It will loosen up tangles for longer haired breeds, like Shetland or Icelandic.
Finishing
Your sheepskin is almost complete! You will be cutting it off the rack now. I prefer to use my go-to blade, or even a razor knife, and I work my way around the edges of the skin cutting it where the edges are soft. I find that inevitably some of the edge hardens and doesn’t get worked well. I cut this off. Work slowly. Sides first, then bottom, and lastly the top. Pull the hide free. What a transformation! Give it a good once over. Does the hair need more brushing? Could it use some hand stretching? I have a stretching post that I work my hides over to finish them. It is a short, stumpy post secured to a small platform that I can stand on while I press the hide down on the sanded down point of the post. All my hides get a good once over on the stretching post, especially the edges. The last step is to oil the skin, which keeps it pliable, soft, works as a preserving agent, and helps the sheepskin stay water resistant. I use a natural beeswax and mink oil-based leather conditioner that I pick up from my feed store. Using a damp sponge, I massage the oil into the skin until it disappears. I then roll up the hide, skin side in, and let that soak in overnight. The following morning I revel in my finished product.
My very first successful sheepskin is nearly two years old now and it is as soft and lovely as the day I finished it. For continued maintenance and care, I oil the underside occasionally and brush out the wool to keep it from looking matted. It should last for years and years, even with daily use.
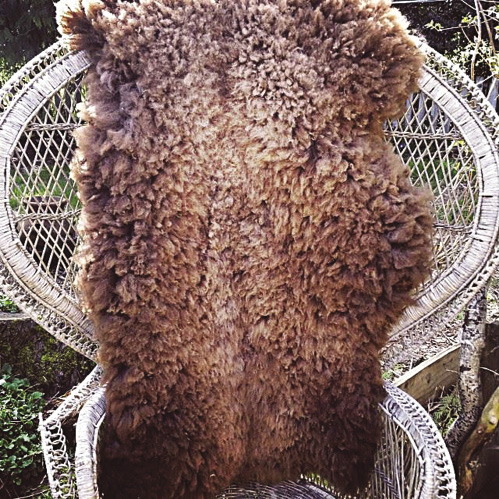
And now to answer the question: What can you do with sheepskin? In this house they are used as chair and couch cushions, blankets, mattress toppers, car seat covers, camp mattresses, picnic cushions, rugs, dog beds (spoiled pups!), and lawn chair cushions in the summer. And any hide that has too many holes in it is used to make collars for coats and other crafty type projects.
Should you fail on your first (or first dozen) tries, start over and try again. You are honoring the animal by using every part. A failed hide is not a waste. There must be some grace given for practice. No artisan has ever perfected their craft with their first attempt.
Happy tanning!

I was given a pelt but in need of cleaning how do I go about getting it cleaned?
This is so awsome ! Thank you so much for sharing! I have just done our first sheep skin from reading your process. Its so beautiful white and fluffy ? I have scraped and scraped and stretched. Iv gotten the muck off while scraping/stretching…. I’m thinking it is dry and mostly pliable… I’m just not 100% sure iv done it fully correctly…. it does feel pliable on the stretching rack but maybe still slightly stiff which I am okay with if it won’t rot this way as we will use as a rug… the fibers are looking leathery but I feel a sliiiggghhht bit of oily or greasyness… not sure if I should keep scraping or if this is the feeling it should be. I wish I had a local friend here that shared the same hobbies as me to give me feedback. I’m leaving it on the drying rack in our house for now to see if it will dry out more but I’m really antsy to cut it off and use it!! Lol
Could I get more details on oiling the hide? I usually smoke them but would love to try this instead!
You don’t wash after the scraping process? I’m not there yet but guessing it is messy/ gooey and gets into the hair around the edges? I have just salted mine as I couldn’t get the brain right away. I did rinse it a bit then to get the blood off, worried now that it’s too wet.? Thanks for a great post!!!
I skipped the initial step of washing the skin and wool before proceeding, following a different manual. I’m now left wondering how I can clean the wool after I’ve completed the tanning process? Thank you!